Choice Eliminator for Google Forms™
Choice Eliminator is a useful Google Forms add-on that limits response counts for multiple choices, checkboxes, and dropdowns in your form.

Discovering Choice Eliminator:
First and foremost, when the response limit is reached, the answer choice gets crossed out in Google Forms™. This powerful tool is perfect for time-sensitive assignments, events with limited seating, or any first-come, first-served signup scenarios.
Benefits
Secondly, this Google add-on provides several advantages that can help you better manage your form schedules and optimize your data collection process:
- Control the number of choice responses: When the choice response limit is reached, the answer choice gets crossed out in Google Forms™. This ensures that you don’t exceed your capacity for events or classes with limited spots available.

CARACTERISTICAS
- Set as many limits as you want for choice options
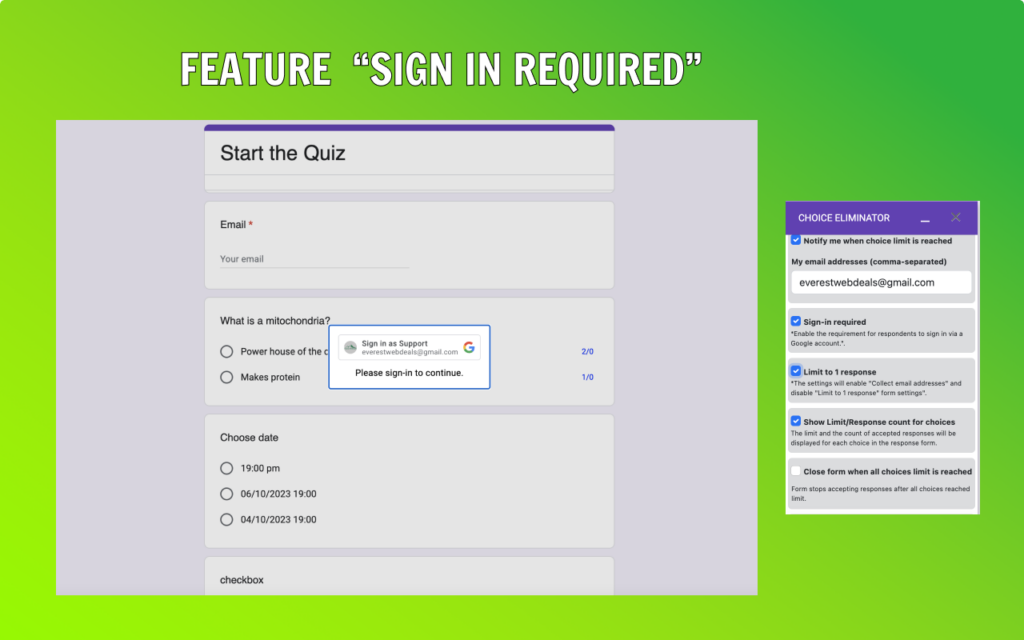
- Get an Email notification when the limit is reached
- View how many responses had been made for options
- Allow for unlimited responses in your Google Forms™
- Open Configuration Config in Full Screen
- Custom final choice text
- Apply custom limit for all choices at one click
- Unlock reached “Limit” option and increase limit.
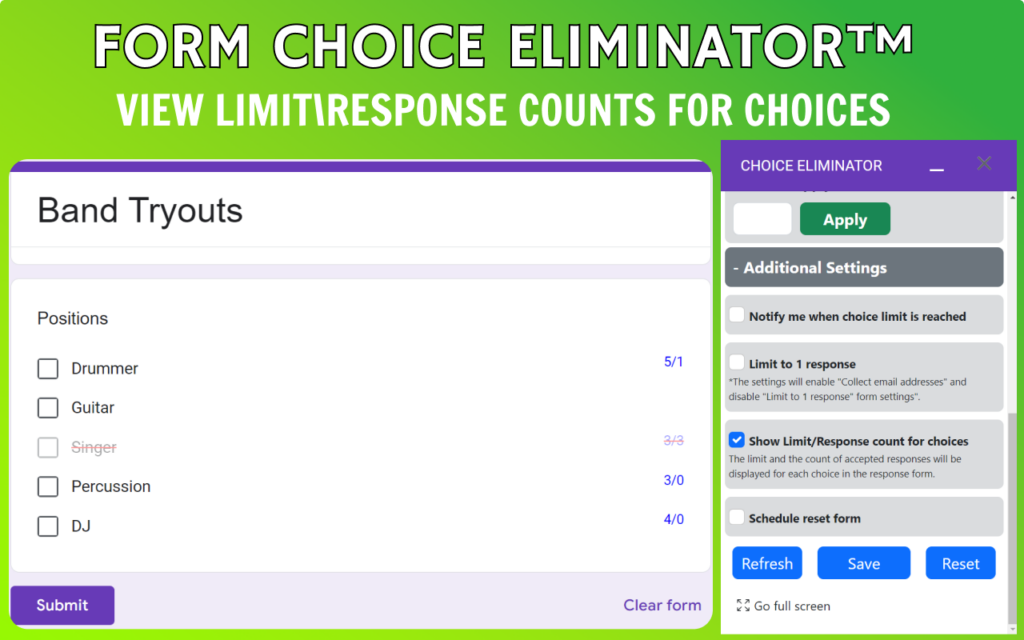
- Show Limit/Response Count for choices.
- Limit to 1 response. The responder can submit the form only once.
- Google Sign in required. Respondents should sign in with a Google account to submit the form.
- Close form when all choices limit is reached.
- Custom Closed Form Message
- QR Code for Form Link.
- Schedule a restore form
- Every hour.
- Every week.
- Every month.
- Specific Date and time.
- Form Response Manager. Key features after deleting the limit sync.
Introducing our innovative “Form Response Manager,” a powerful tool that helps you effortlessly find, sort, view, delete, and analyze your Google Form responses. This feature stands out for its exceptional user-friendliness and comprehensive response management capabilities, making it an ideal solution for form limiters and managing form limits. In contrast, Google Forms’ built-in Response Manager only allows email-based searches and offers a challenging interface for response management.
Our add-on retrieves responses directly from Google Forms and does not store them on our server. Your form responses remain private, and we cannot read or view them.
The “Show Limit/Response Count for choices” is a unique feature of the Form Choice Eliminator add-on for Google Forms. This tool enhances capacity management for various options in your forms and displays the Limit/Response count for choices.
Within the Choice Eliminator add-on, this distinctive feature enables the form creator to set a maximum selection count for each option in multiple-choice, drop-down, or checkbox type questions. This is particularly useful in event registration or surveys, where limited availability or balanced feedback is crucial.
Once an option’s limit is reached, the Choice Eliminator crosses it out in the form, preventing further selections. It diligently tracks and adjusts availability based on response counts.
For example, when organizing a workshop with different sessions each having limited slots, these limits can be set using the Choice Eliminator. Once slots for a session are filled, that option is crossed out, effectively avoiding overbooking.
The “Show Limit/Response Count for choices” feature in the Choice Eliminator add-on is a simple, effective way to automate and manage choice availability based on real-time responses, enhancing the efficiency of your Google Forms.
Our other Google add-ons:
- Form Choice Limiter, Eliminator, Limit, Removal
- GPT plus Google Docs™, ChatGPT, OpenAI, Chat GPT
- Choice Eliminator for Google Forms™, Choice limit
- GPT Quiz Generator for Forms™, Chat GPT test
- Form Response Limit, FormLimiter, Form Start/Stop
- Límite de campo de formulario
- Generador de archivos de documentos
- Función por color